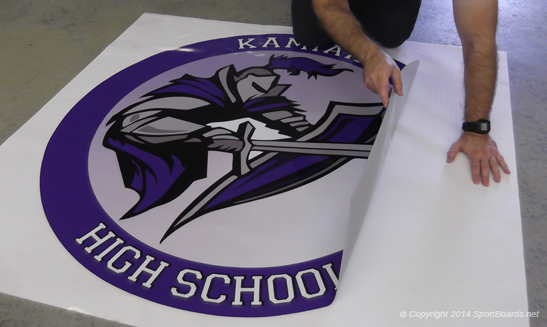
A quick guide to the process of installing floor graphics

Floor graphics have been a topic of conversation – and indeed, customer demand – for reasons that we might have scarcely imagined becoming reality before March. Nonetheless, they’re continuing to prove their worth, and not just for enforcing social distancing in supermarkets – indeed, they have long been used in all manner of other ways, both indoors and outdoors, to capture public attention.
For the benefit of those who may not have used floor graphics previously, they usually consist of a printed self-adhesive vinyl, with an anti-slippage film over-laminate on top.
Not all floor graphics are the same, however; the various options do differ depending on such factors as the types of adhesives used and the durability of the applied over-laminate. This makes different floor graphics suitable for different external conditions and longevity requirements.
Preparing the film for application
The process begins, of course, not with the final application but instead with the preparation of the floor graphics for that stage. The image graphic itself is typically created using a household-name design tool such as Photoshop or Illustrator, prior to the addition of cutting marks that will be cut using an automatic cutter.
Then, various considerations will need to be made with regard to the substrate base, including whether the substrate and its adhesive are adequate for the floor on which one intends to apply the sign.
The relevant anti-slip requirements are also crucial, as certain safety regulations may apply for the space in which you plan to apply the floor graphics, whether it is a school, nursery, work space or public space, to cite just some of the possibilities.
Once you have made the right choice of printing and protection substrates for the requirements of the application, you will need to determine the suitable print settings for your solvent or latex printer. Finally, you will be ready to actually print!
As renowned specialists in wide format printing solutions that go well beyond media and ink here at Prizma Graphics, we may even be able to supply you with the ideal machine for the task from the extensive range in our online store.
So, will you then be ready to apply the film?
The short answer is: not quite! After all, at this point, you will need to take care with your handling of the samples, gloves being recommended to avoid causing accidental cuts or leaving fingerprints on the surface. Most floor graphics also need to be laminated at this point with a film, which will protect it from damage and provide anti-slippage.
Then, once you have placed the sign on a table or in a roll cutter, you will be able to cut the sign. This can be followed by the preparation of the floor for application; a broom, all-purpose cleaner and industrial-strength cleaner – the latter for removing any lingering contaminant – will help you to do a thorough job.
As for the application itself, your approach here will differ depending on whether you are applying to a smooth or rough floor. If it is the former, the sign can be applied using a soft squeegee, whereas in the case of the latter, particular care will need to be taken to ensure the vinyl perfectly conforms to the floor, so that it can achieve good adherence.
In the instance of a rough floor, then, the vinyl should be applied by hand without pressing it down. You can then soften it with a heat gun, and with the assistance of a foam roller, press the sign down while the vinyl is still soft, so that it conforms to the shape of the floor.
Don’t forget about that R anti-slip rating!
Finally, R anti-slip ratings are also given to laminate film for floor graphics. The slip resistance for such films is determined by the DIN Standard Floor RAMP Test, with values starting at R9 for the lowest slip resistance, and increasing through to the highest floor slip resistance, R13.
Our own Crystal Matt Floor Laminate Film has an R9 rating, which is suitable for indoor floor graphics. Floorwall 150, meanwhile, has an R10 rating and is a one-step process, consisting of a printable PVC that doesn’t need laminating as it has an anti-scuff and anti-slip finish.
Here at Prizma Graphics, we recommend laminate film of R11 to R13 for outdoor floor graphics, depending on where the graphics are to be situated. If they will be applied in an environment where they will frequently get wet, such as by a pool, a higher rating will be required to prevent slipping when wet.
If you have questions about any of the above aspects of choosing, handling and applying floor graphics, please don’t hesitate to call the Prizma Graphics team today, on 01296 393700, for suitable advice and guidance before committing to a purchase.
